Creating Shared Steps
2 min read
Create a shared step when a repeated flow should be maintained once and reused in repository test cases.
Open the Create Shared Step Window
Section titled “Open the Create Shared Step Window”- Open the workspace or project where the shared step should live.
- Go to Shared Steps.
- Select Create Shared Step.
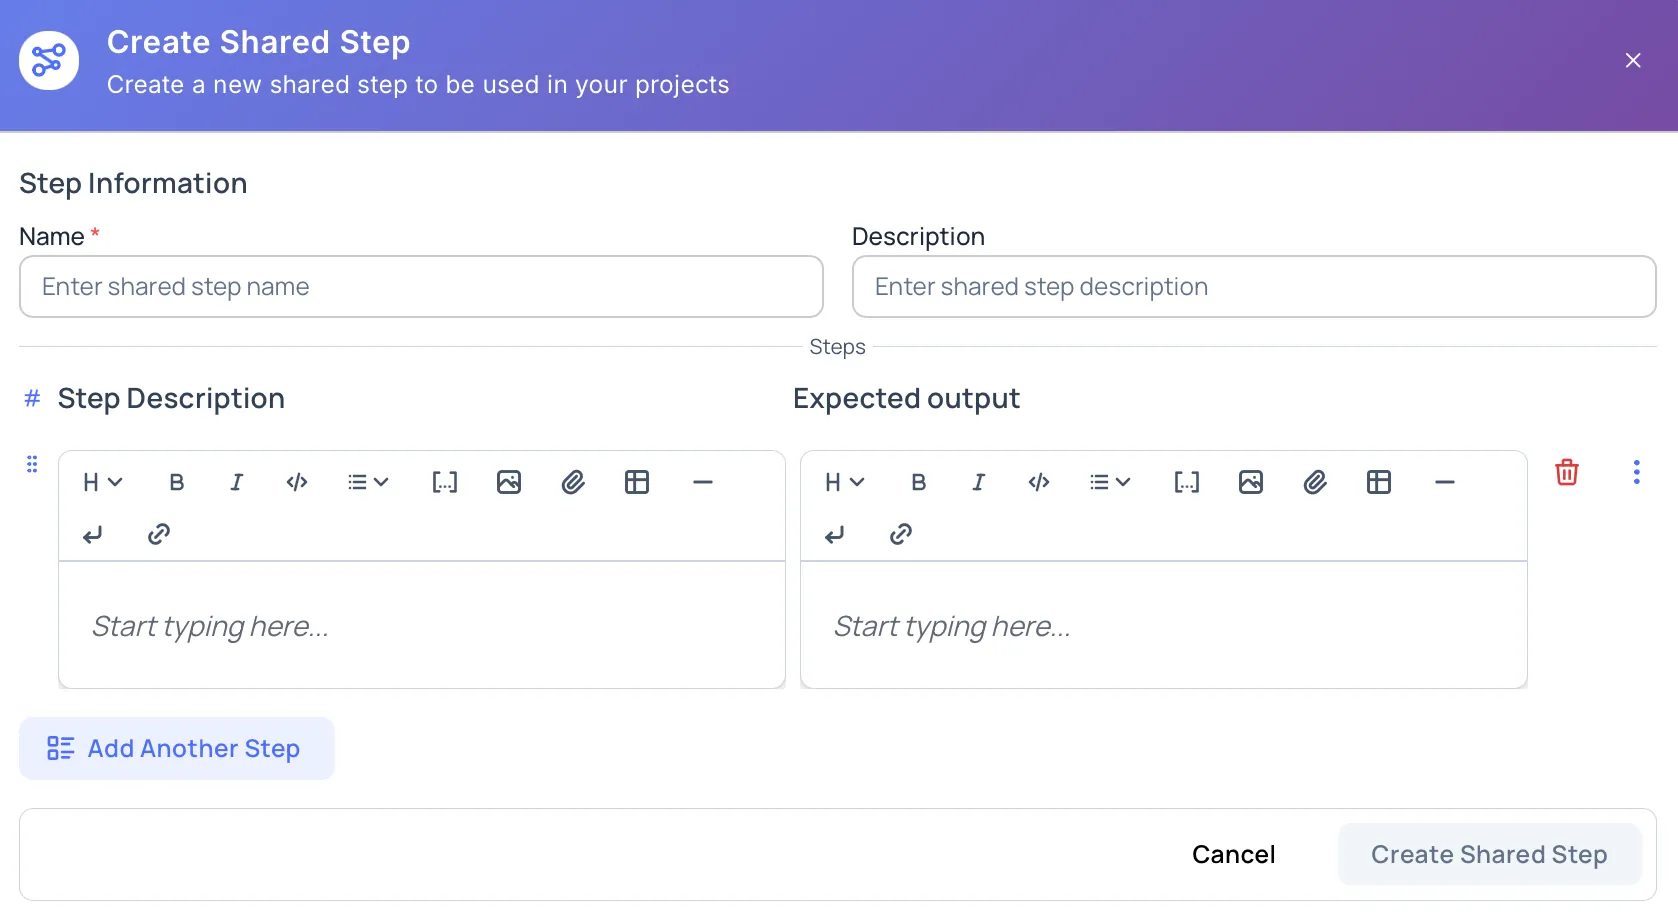
Shared Step Information
Section titled “Shared Step Information”The name is required. Use a clear action-oriented name, such as User logs in with valid credentials or Add product to cart.
The Create Shared Step button stays disabled until the name is filled in.
Description
Section titled “Description”The description is optional. Use it to explain when the shared step should be used, what flow it represents, or any limits the team should know.
Add Step Rows
Section titled “Add Step Rows”A shared step can contain one or more step rows. Each row includes:
- Step Description: the action to perform.
- Expected output: the result the tester should observe.
Use Add First Step to start the shared step. After a row exists, use Add Another Step to add more rows.
Step Row Actions
Section titled “Step Row Actions”While creating a shared step, users can:
- Reorder rows by dragging them.
- Duplicate a row.
- Insert a row above or below another row.
- Delete a row.
- Add attachments to step descriptions or expected outputs.
- Use rich text, mentions, and parameters in supported editors.
Parameters make shared steps more flexible when values such as URLs, accounts, or environment names change.
Create Behavior
Section titled “Create Behavior”Select Create Shared Step to save the shared step. While Hawzu creates it, the button shows Creating….
Select Cancel to close the window. If you changed the name, description, or rows, Hawzu protects you from accidentally losing unsaved work.
Workspace vs Project Creation
Section titled “Workspace vs Project Creation”Create a shared step at the workspace level when the flow should be available across projects. Create it at the project level when the flow belongs to one project.
Learn more in Workspace vs Project Scope.
After Creating
Section titled “After Creating”After the shared step is created, it appears in the Shared Steps table and can be inserted into repository test cases from the Insert Shared Step window.