Creating Test Cases
3 min read
Test cases are created from the Repository inside a project. A test case can include core details, classification, folder placement, requirement links, labels, custom fields, preconditions, and test steps.
This page covers the current create flow only.
Open the Create Testcase window
Section titled “Open the Create Testcase window”You can open the create window from the Repository in a few places:
- Open a project and go to Repository
- Choose a folder if you want to create the test case inside that folder
- Open Create Testcase from the folder actions or folder menu
If you start from a folder, that folder is preselected as the parent folder.
Create window layout
Section titled “Create window layout”The create window is split into two main sections:
- Testcase Information
- Steps & Preconditions
You usually start in Testcase Information, then select Next: Steps & Preconditions when the basic details are ready.

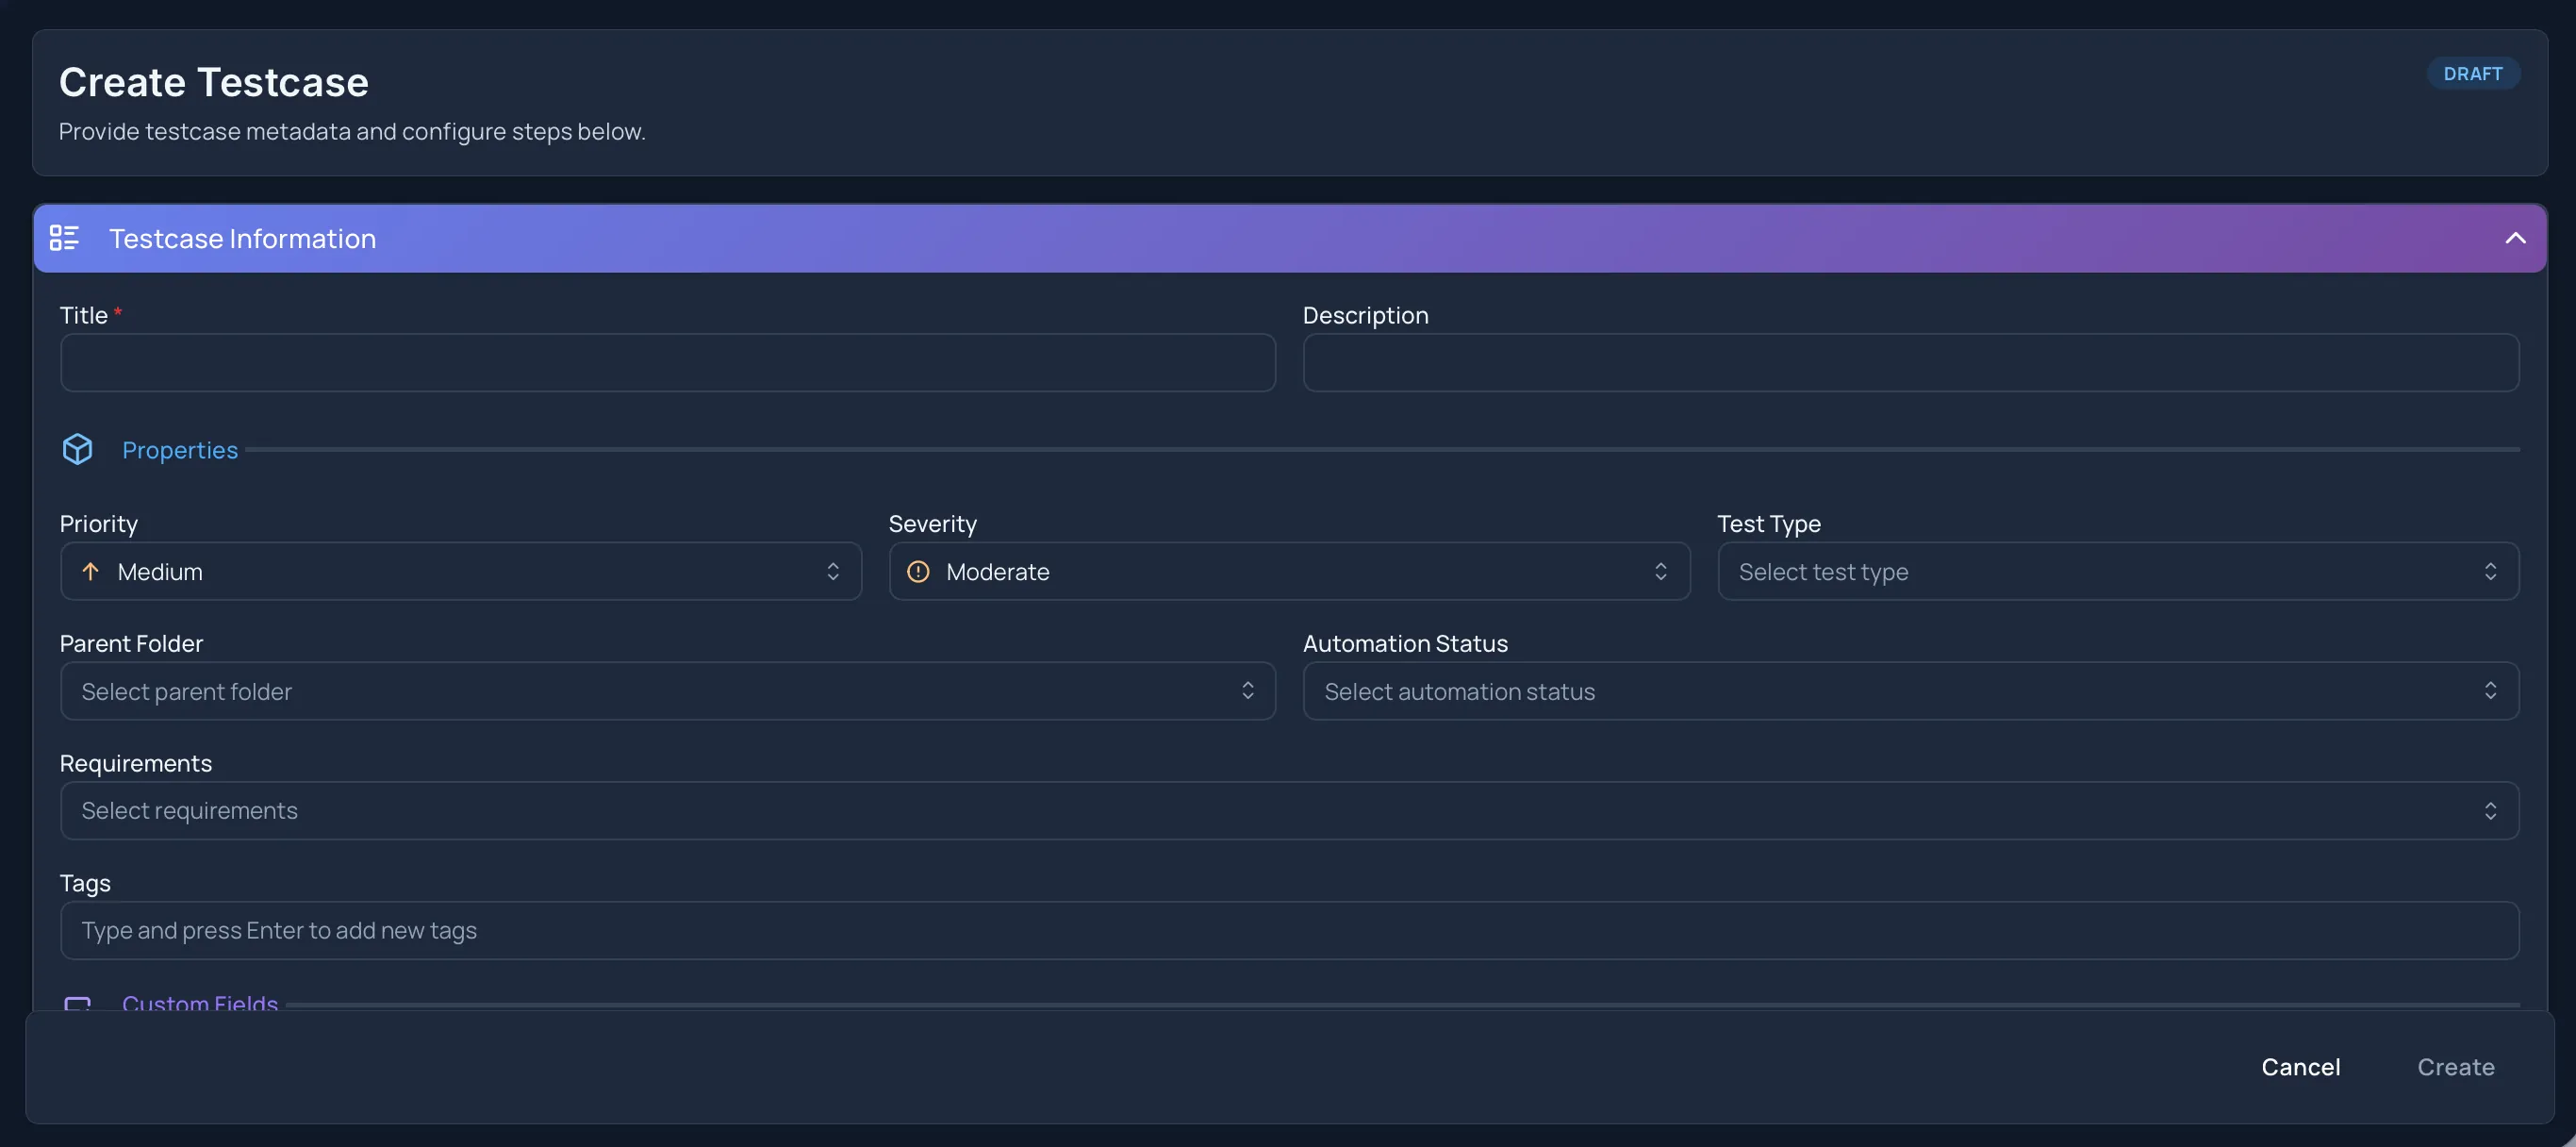
Testcase Information
Section titled “Testcase Information”Basics
Section titled “Basics”Title is required.
- Enter a clear test case name
- The title must be at least 3 characters
- The Create button stays unavailable until a valid title is entered
Description
Section titled “Description”Description is optional.
Use it for a short summary or extra context about what the test case covers.
Properties
Section titled “Properties”The Properties area lets you classify the test case.
Priority
Section titled “Priority”Visible options:
- High
- Medium
- Low
New test cases open with Medium selected by default.
Severity
Section titled “Severity”Visible options:
- Blocker
- Critical
- Moderate
- Minor
- Enhancement
New test cases open with Moderate selected by default.
Test Type
Section titled “Test Type”Visible options:
- Functional
- Regression
- Smoke
- Sanity
- Exploratory
- Security
- UI / UX
- Integration
- Performance
This field is optional.
Organization
Section titled “Organization”The Organization area controls where the test case belongs and what it connects to.
Parent Folder
Section titled “Parent Folder”Choose the folder where the test case should live in the Repository.
Automation Status
Section titled “Automation Status”Visible options:
- Manual
- To Be Automated
- Automation In Progress
- Automated
This field is optional.
Requirements
Section titled “Requirements”Use Requirements to link one or more requirements to the test case for traceability.
Labels
Section titled “Labels”Use Labels to assign project labels to the test case.
You can search and select existing labels from the label picker.
Custom Fields
Section titled “Custom Fields”If your project has active custom fields for test cases, they appear in the Custom Fields section.
- Required custom fields must be completed before the test case can be created
- Disabled or deprecated fields are not treated as required for creation
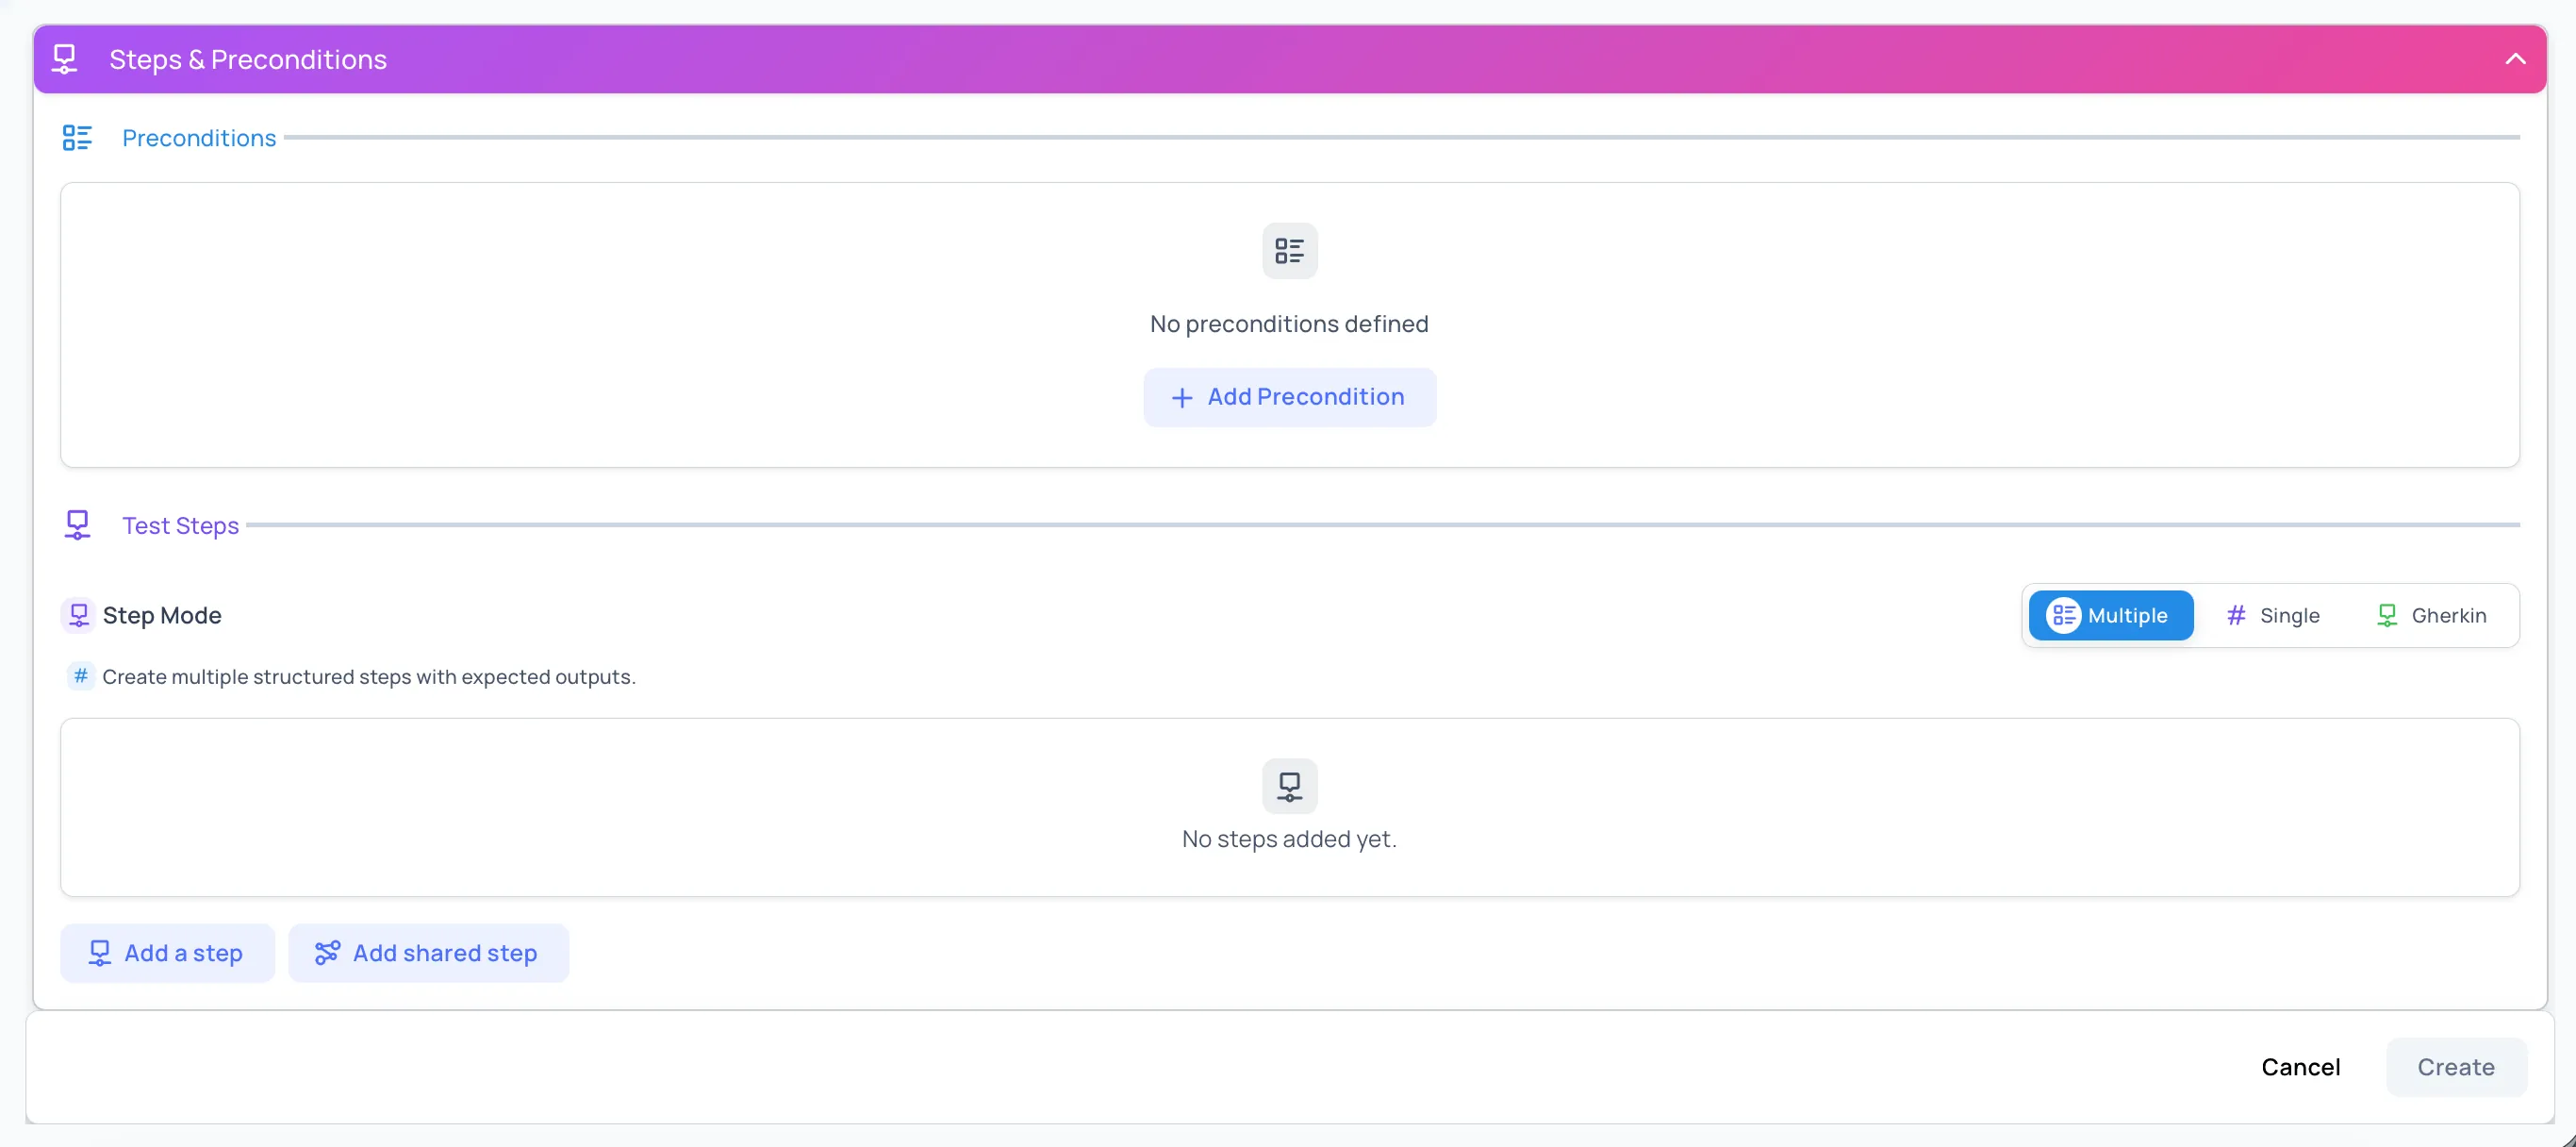
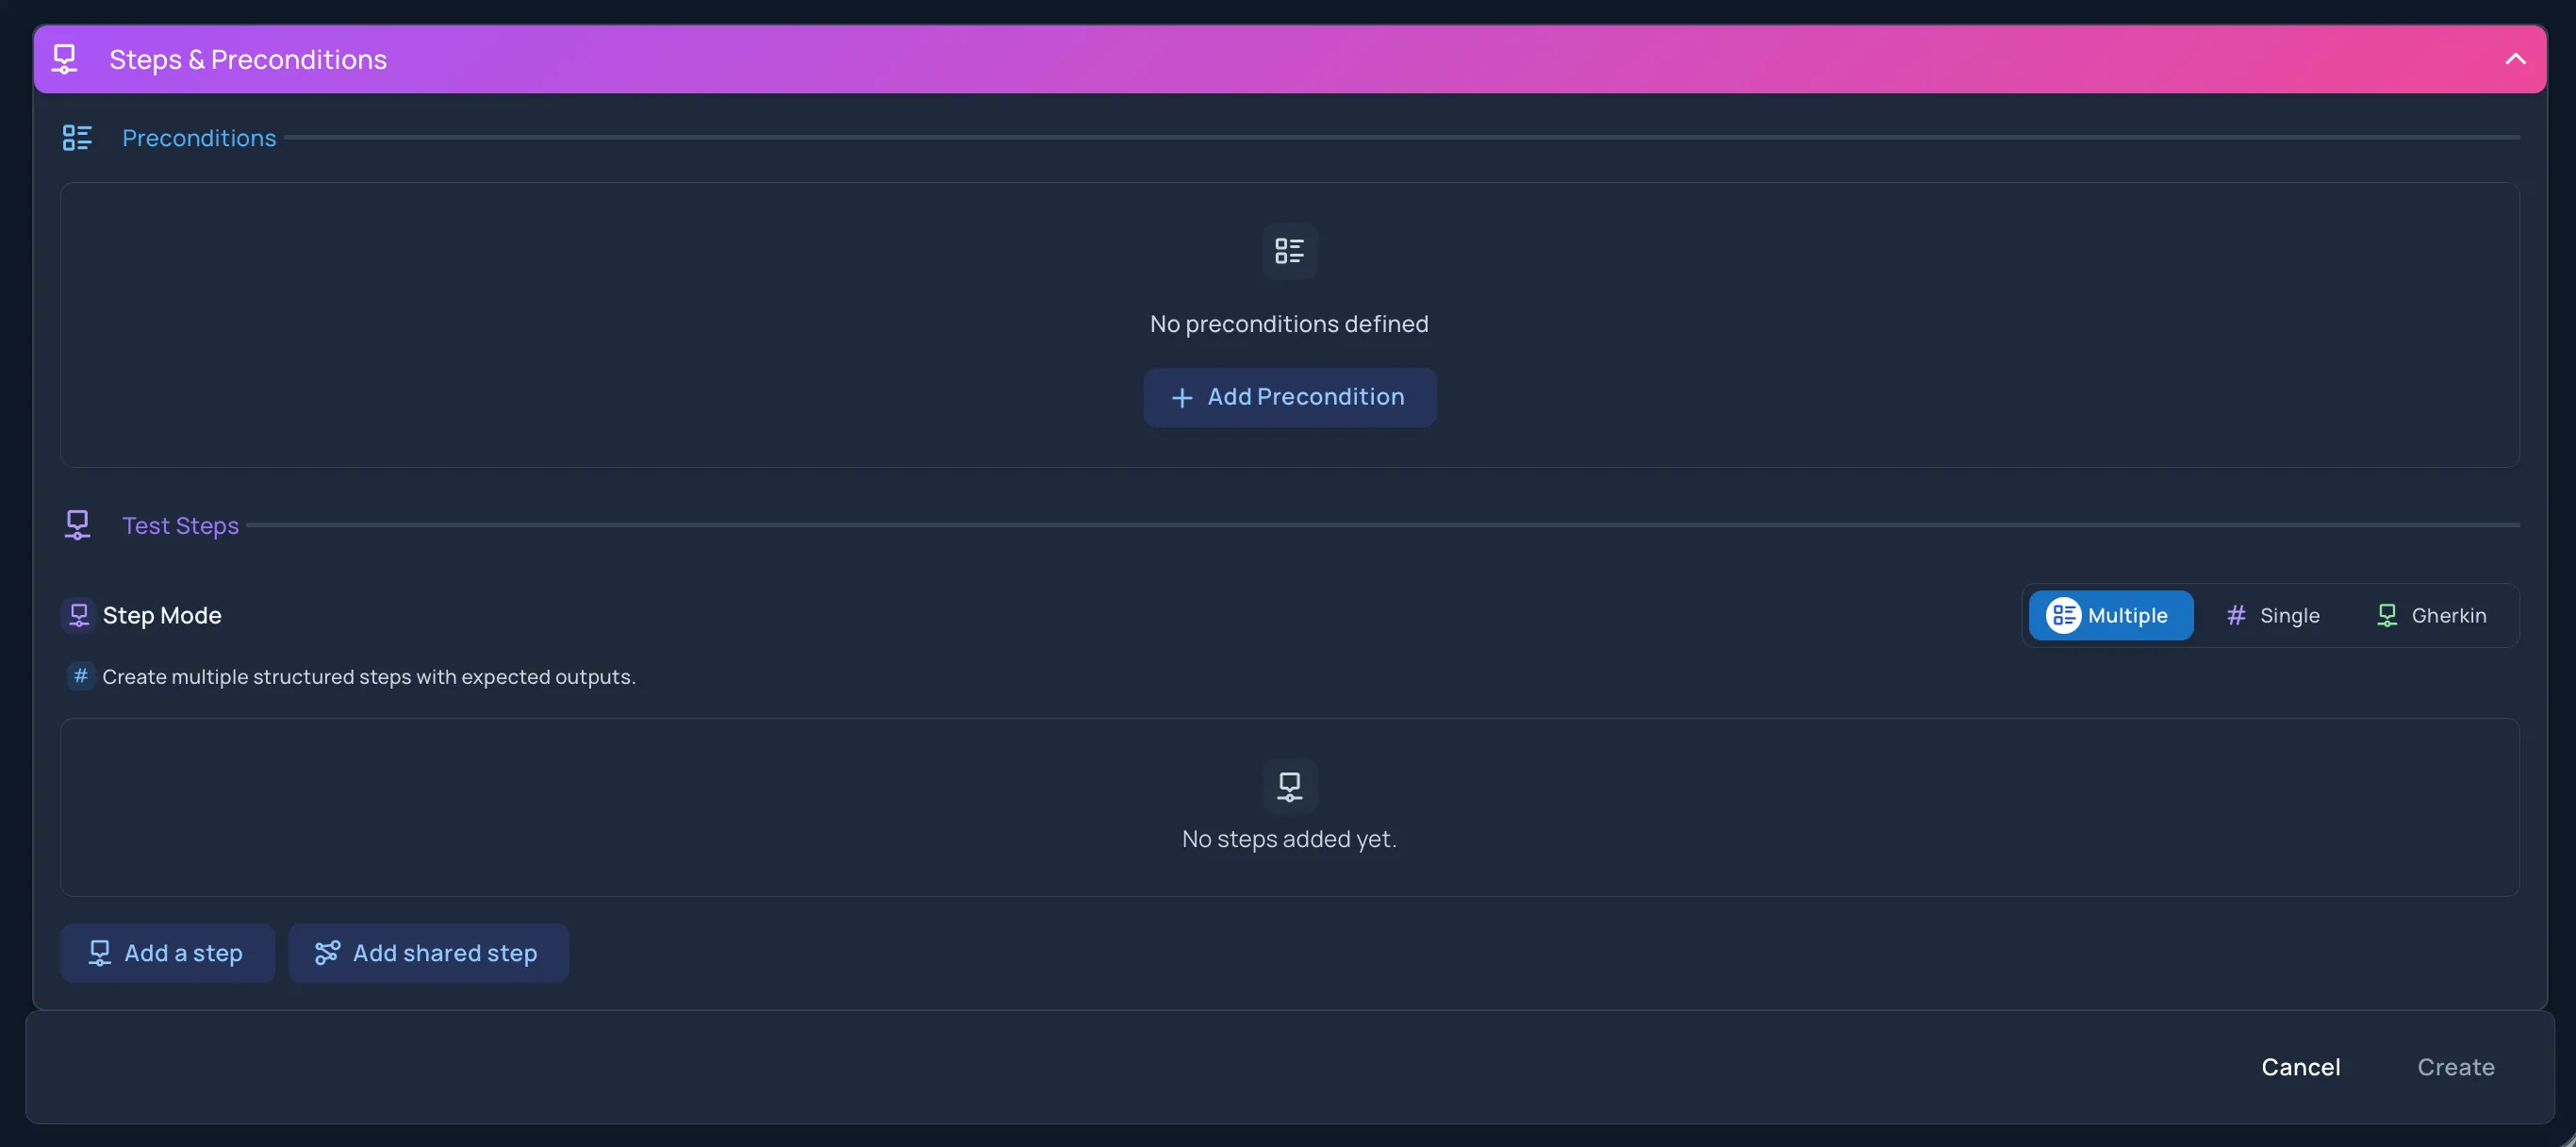
Steps & Preconditions
Section titled “Steps & Preconditions”The second section holds the test instructions and expected behaviour.
Preconditions
Section titled “Preconditions”Use Add Precondition when the test needs setup or a prerequisite state.
A precondition can include:
- Rich text
- Attachments
- Variable insertion
- Mentions
You can also remove the precondition if it is no longer needed.
Step Mode
Section titled “Step Mode”Hawzu supports three step modes:
Multiple
Section titled “Multiple”Use Multiple when you want structured step rows with:
- Step Description
- Expected Output
This is the default step mode.
In this mode you can:
- Add a step
- Add another step
- Reorder steps
- Duplicate steps
- Insert steps above or below
- Add shared steps
- Import test steps from a file
Single
Section titled “Single”Use Single when the test case is simple and only needs one combined step with one expected output block.
Gherkin
Section titled “Gherkin”Use Gherkin to write behaviour-driven scenarios using Gherkin-style clauses.
Add shared steps
Section titled “Add shared steps”From the Multiple step mode, select Add shared step to insert a reusable shared step.
The shared-step window lets you:
- Search and select a shared step
- Preview its step descriptions and expected outputs
- Add it into the current test case
Import test steps
Section titled “Import test steps”From the Multiple step mode, you can open Import Test Steps from File.
Visible import options include:
- Excel
- JSON
- CSV
You can choose whether to:
- Append imported steps
- Replace the current step list
The import tool also includes sample downloads for the supported formats.
Rich editing inside steps
Section titled “Rich editing inside steps”Preconditions and test steps support rich editing features such as:
- Attachments
- Variable insertion
- Mentions
In supported step modes, Hawzu also shows rewrite actions for improving test case wording.
Create or cancel
Section titled “Create or cancel”At the bottom of the window:
- Cancel closes the create flow
- Next: Steps & Preconditions moves from the first section to the second
- Create saves the new test case
If you changed the form and try to leave without creating the test case, Hawzu shows unsaved-change protection before closing.
What happens after creation
Section titled “What happens after creation”After you create the test case:
- It appears in the selected folder or repository root
- It can be opened from the Repository details view
- It becomes available for test suites, executions, test runs, requirements traceability, and other linked workflows