Quick Start Guide – Hawzu Test Case Management Setup
This guide walks you through the essential steps to start using Hawzu. By the end of this guide, you will be able to:
- Create a project
- Organize test cases using test folders
- Create structured test cases
- Execute test cases using test runs
- Track execution results and defects
Prerequisites
Before you begin, ensure that you have:
- An active Hawzu account (sign up at https://app.hawzu.com)
- Access to a workspace
- Basic familiarity with test case management concepts
Projects
In Hawzu, a project represents a single application or product under test. All test cases, test runs, and defects are scoped within a project.
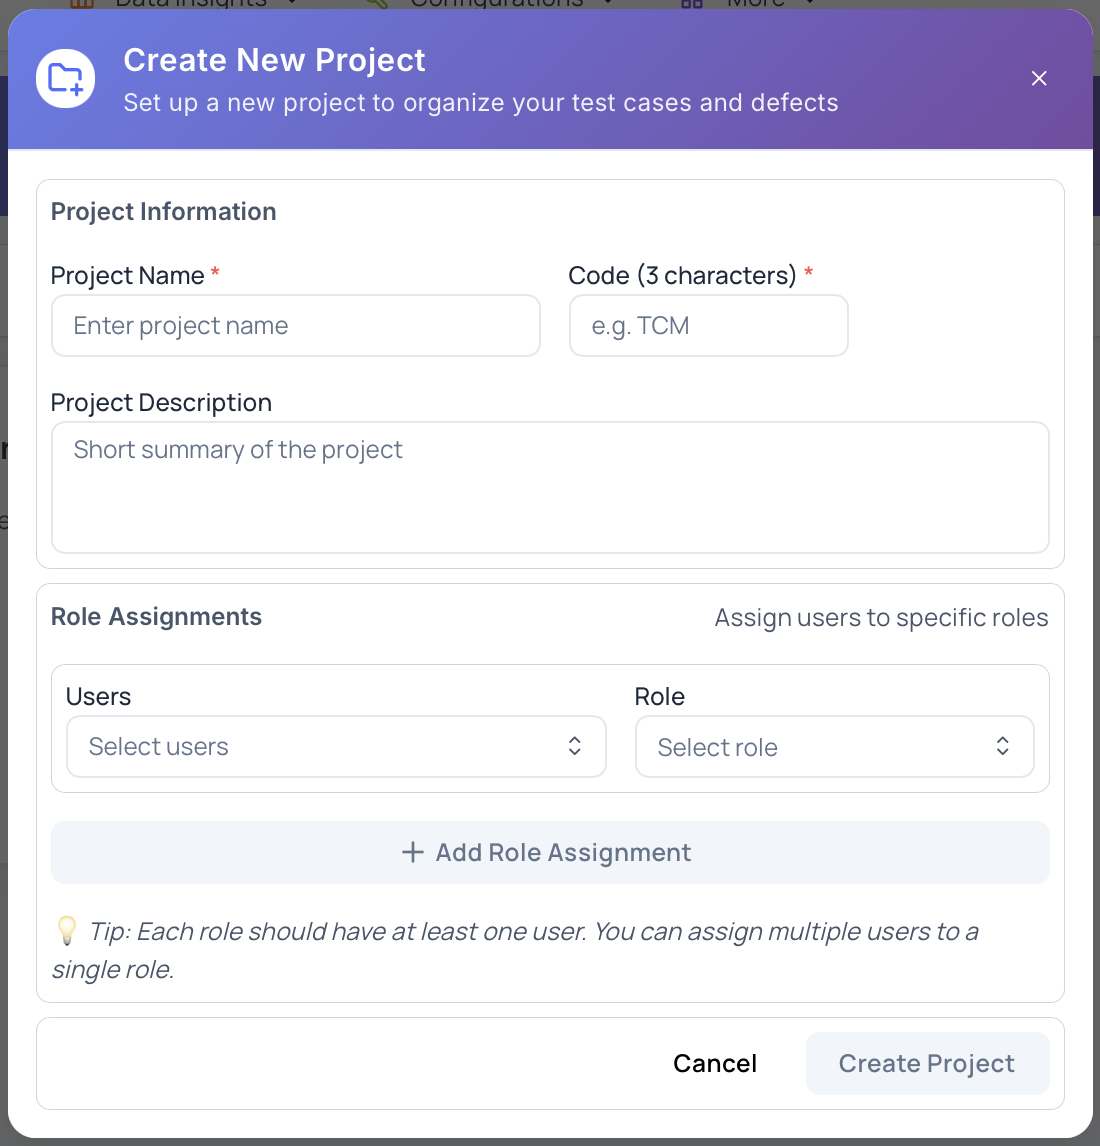
Create a project
- Log in to https://app.hawzu.com.
- On the Projects page, click Create New Project.
- Provide the following information:
- Project Name
- Project Code (3-character identifier)
- Project Description (optional)
- Assign users to appropriate project roles.
- Click Create Project.
Note: After creating a project, you are not redirected automatically.
Select the project from the Projects list and open Repository from the left navigation panel.
Test Folders
Test folders are used to organize test cases hierarchically within a project. They help group related test cases by feature, module, or functionality.
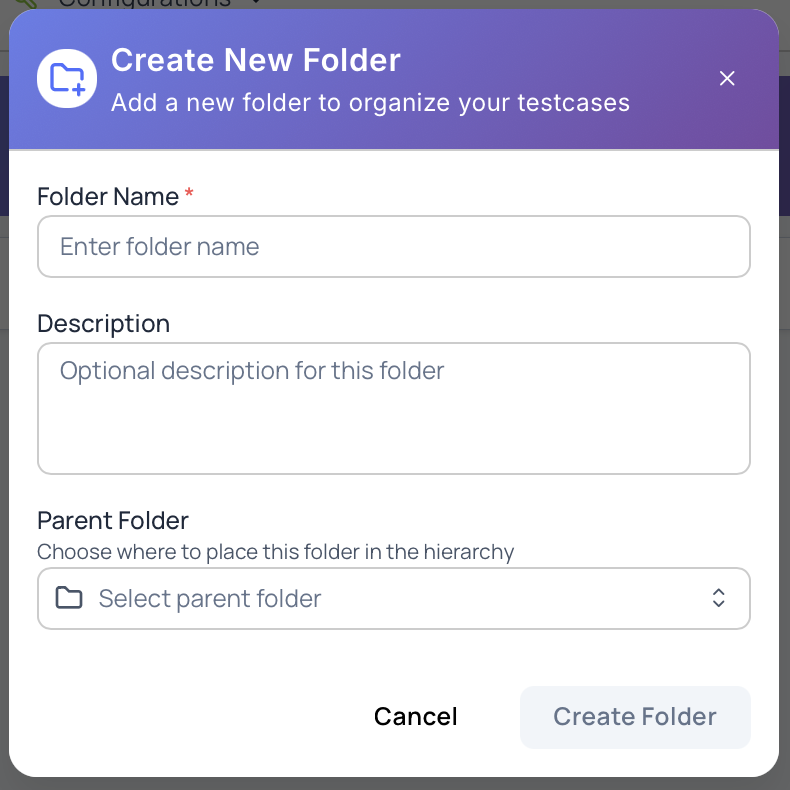
Create a test folder
- Navigate to Repository from the left navigation panel.
- Click + Add and select Add Folder.
- Enter the following details:
- Folder Name
- Description (optional)
- Parent Folder (optional; defaults to Root)
- Click Create Folder.
Test Cases
Test cases in Hawzu are created using a structured form that captures all required metadata and execution steps. Hawzu does not support quick or title-only test cases.
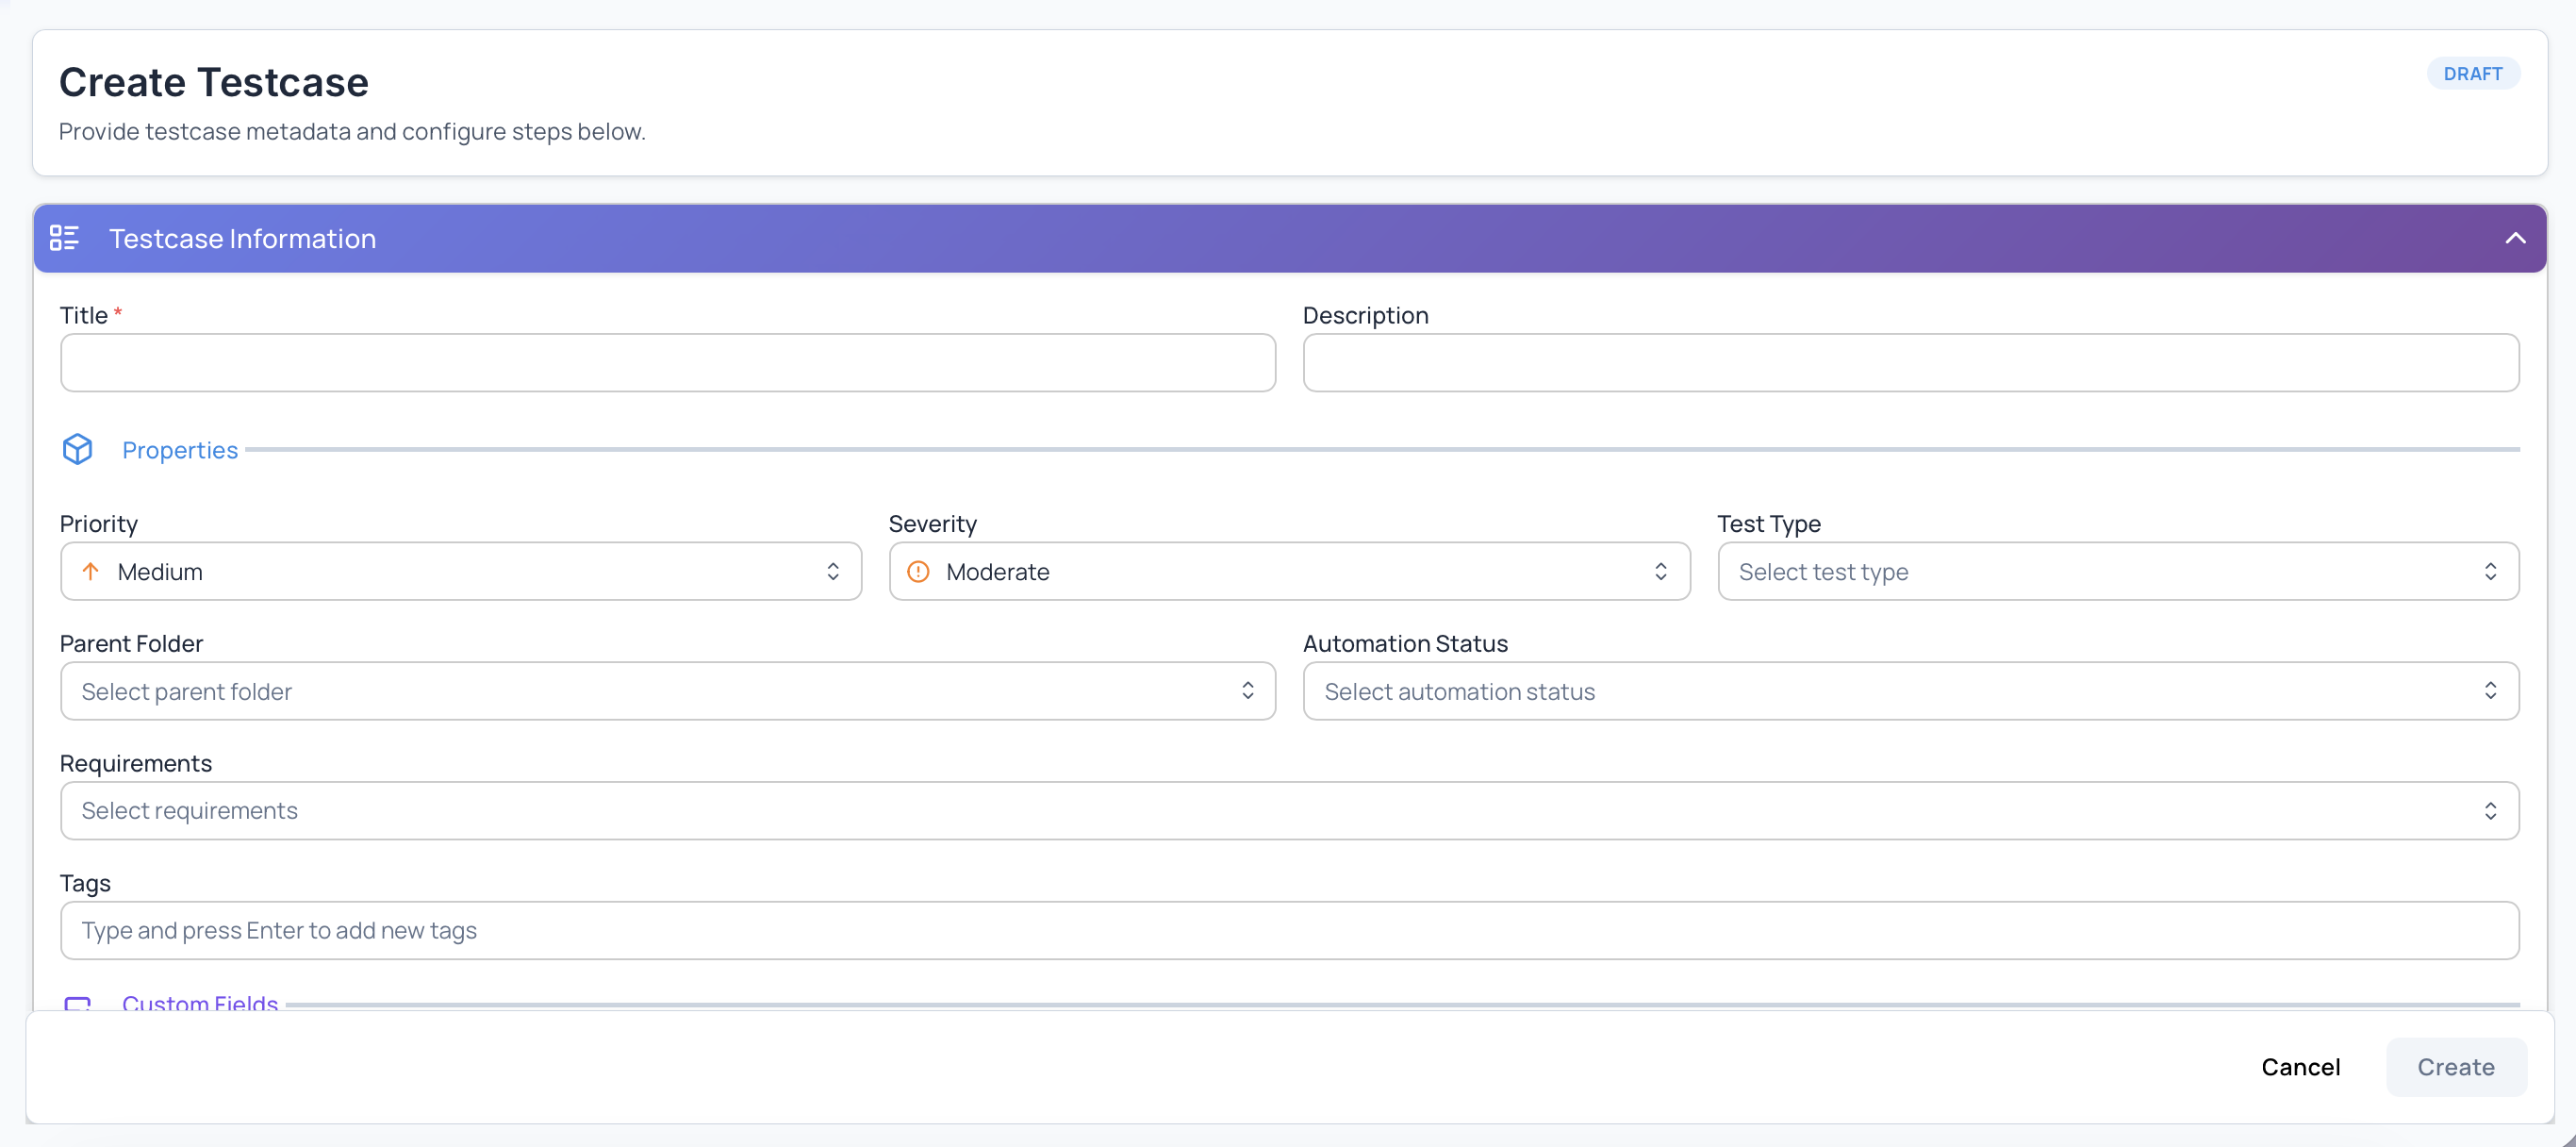
Create a test case
- From Repository, click + Add and select Add Testcase.
- In the Testcase Information section, provide:
- Title (required)
- Description (optional)
- Priority
- Severity
- Test Type
- Automation Status
- Parent Folder
- Requirements
- Tags
Preconditions and Test Steps
Each test case can define preconditions and execution steps using multiple supported formats.
Preconditions
Use Preconditions to describe any setup required before executing the test case, such as system state, data preparation, or configuration.
Step Modes
Hawzu supports multiple step definition modes:
- Multiple – Create structured steps with actions and expected outputs
- Single – Use a single free-flow step description
- Gherkin – Define scenarios using BDD-style Gherkin syntax
Add steps or shared steps as required, then click Create to save the test case.
Test Runs
A test run represents the execution of selected test cases against a specific build, release, or environment.
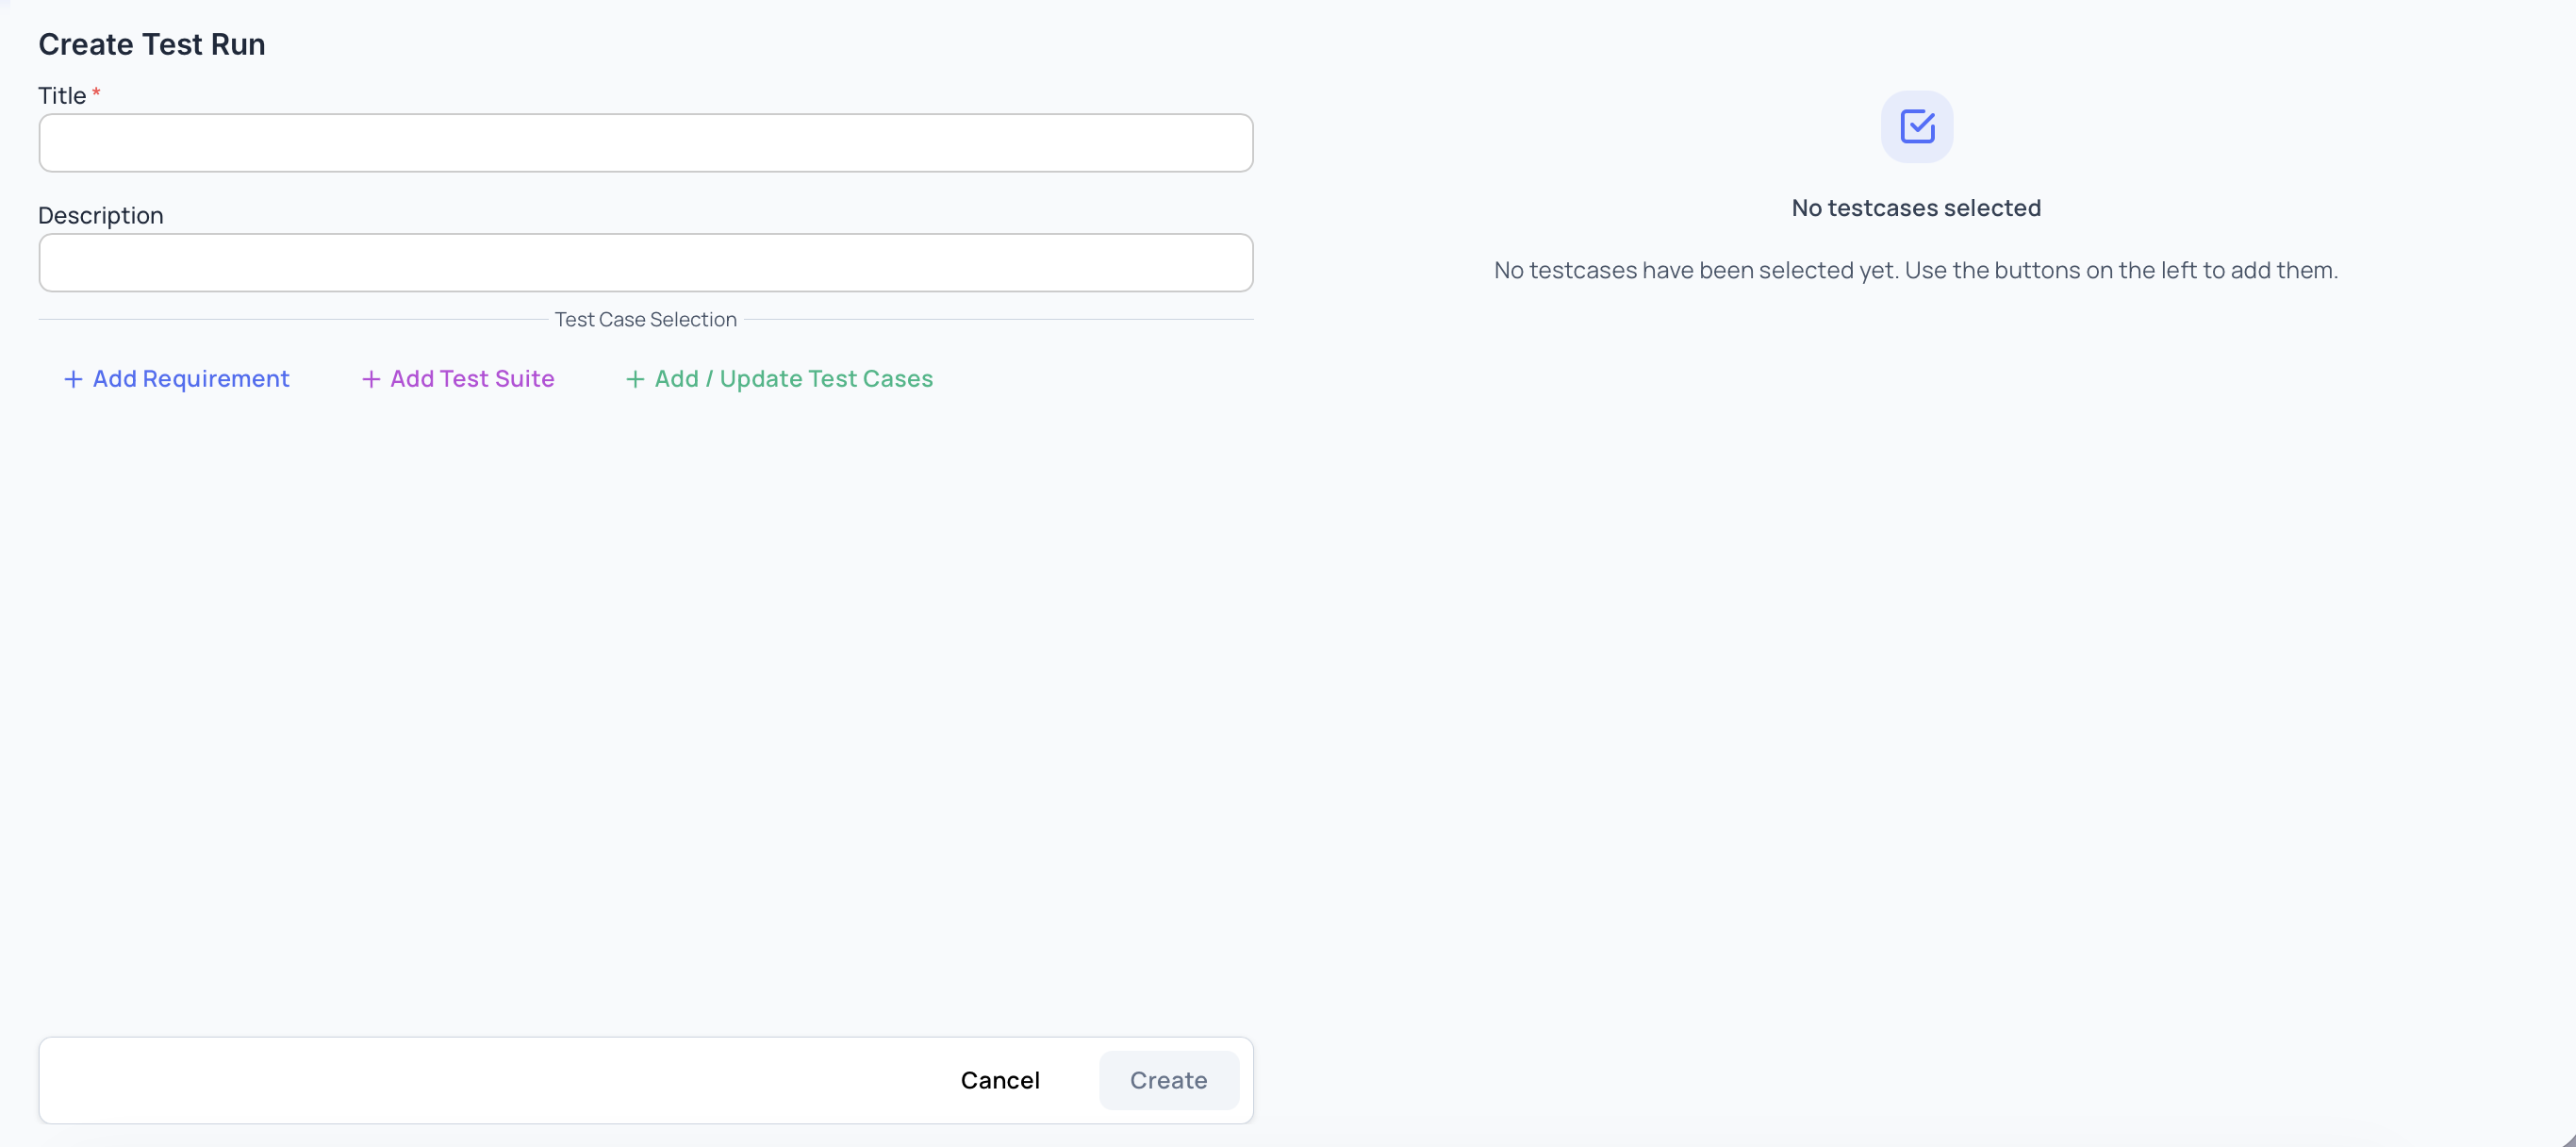
Create a test run
- Navigate to Test Runs.
- Click Create Test Run.
- Provide:
- Title
- Description (optional)
- Select test cases using one or more of the following:
- Add Requirement
- Add Test Suite
- Add / Update Test Cases
- Click Create.
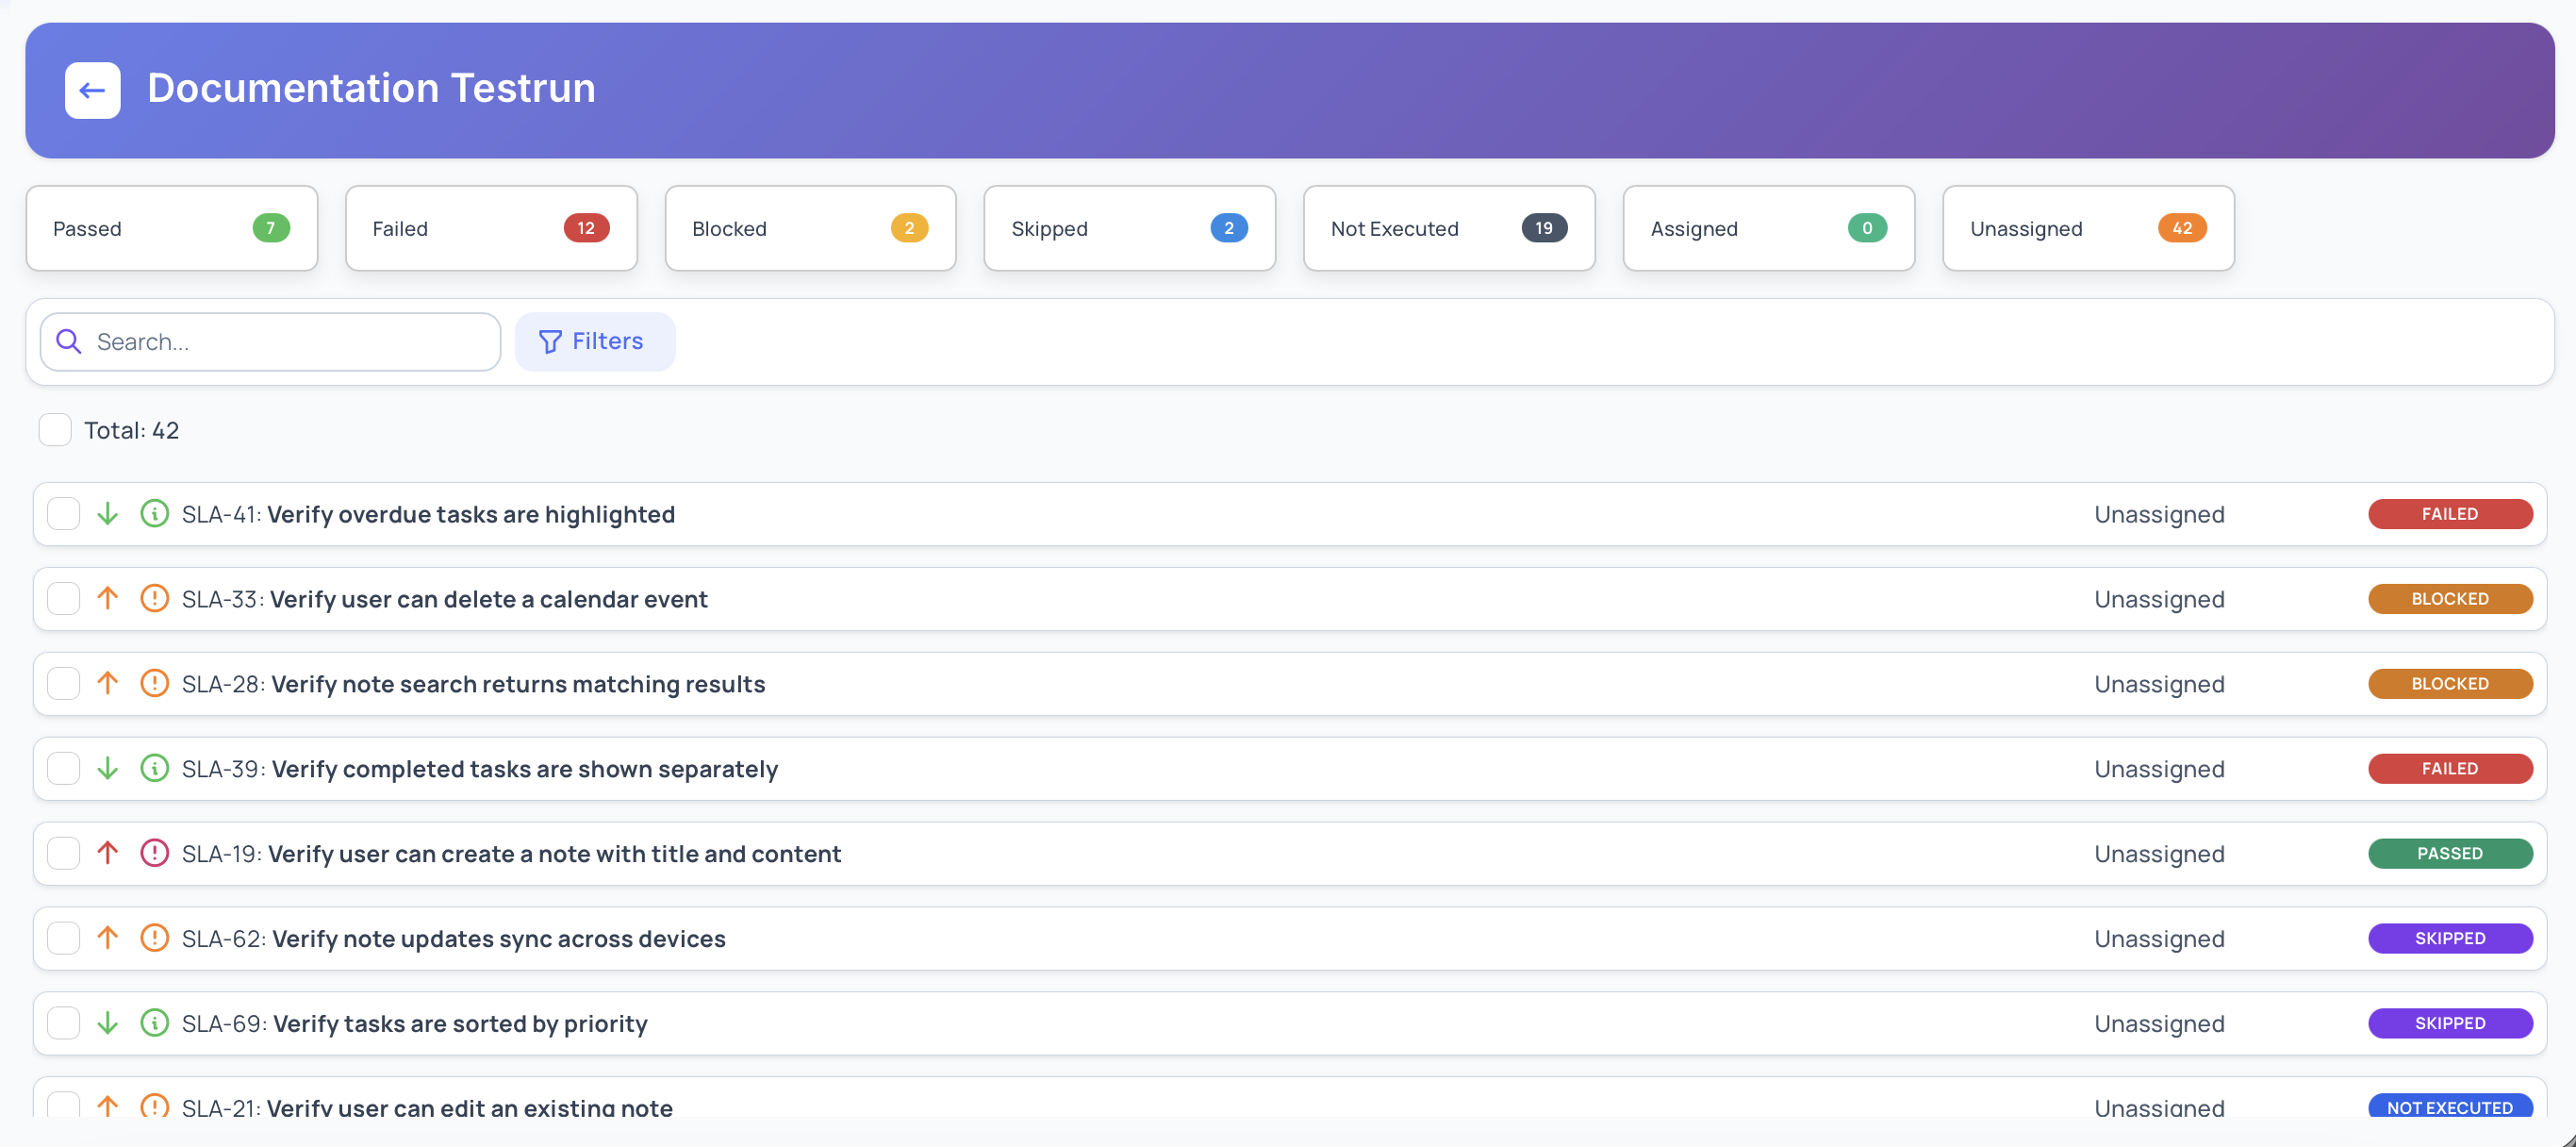
Executing a Test Run
Once a test run is created, you can begin execution:
- Mark test cases as Passed, Failed, Blocked, Skipped, or Not Executed
- Assign test cases to users
- Filter and search test cases
- Track execution progress and summary metrics in real time
Defects
Defects represent issues identified during test execution and are linked to failed test cases.
Create a defect during execution
- During test execution, mark a test case as Failed.
- Provide execution details such as:
- Comments
- Execution time
- Attachments
- Enable Create Defect and enter defect details.
- Submit to create and link the defect to the test run.
What’s Next?
After completing this quick start guide, explore the following topics: